Showing posts with label projects. Show all posts

Thursday, January 3, 2013

Productivity Feels So Good

Until just a few days ago, I was TWO YEARS behind on the family photo books I started after Evan was born.  This was one of those projects I vowed to continue in an effort to preserve memories and to make use of the thousands of pictures I take.  Of course I got a little off track.

I was so proud of the first two I made simply because we actually had pictures to look at in print and not on the computer.  The second book I made ended with Evan's 2nd birthday party and the announcement of Mattie Jane's due date that following October.  Let's just say after Mattie was born I got bogged down in Mommy duties that following year.  Once I allowed myself to be one year behind, I became overwhelmed and let yet another year sneak by me.  It's a vicious cycle - what can I say?

The last couple of breaks I've had from school, I kept promising myself I would take some time to get these photo books complete and up-to-date.  Unfortunately, vacations and holidays got in the way, and I should just confess that I am the world's WORST procrastinator.  But...I am happy to say that I finally completed the task at hand!

Let me proudly introduce...

Stinnett Family Yearbook, Volume III


Stinnett Family Yearbook, Volume IIII


Friday, December 30, 2011

Twenty Twelve Resolutions


I'm still trying to wrap my mind around the fact that a new year is upon us.  I absolutely have no clue where 2011 went.  That may have something to do with my life being swallowed whole consumed by a new baby, a new job and a new way of life.  Staying busy certainly doesn't make time stand still.

Feeling like I finally have everything under control, or maybe that I'm able to deal with my load with some sanity in tact, I am feeling refreshed welcoming 2012.  I'm coming into this year with a clear head, but with some definite changes in mind.  Behold, my twenty twelve resolutions:

1. Register for a 5K
I began training for a 5K (my marathoner mom is laughing at this right now, I'm sure) at the beginning of this year and did something to my ankle.  Taking time off to let my ankle heal turned into giving up on the race all together.  I was really disappointed in myself for not sticking with it...so I joined the gym.  Two weeks later, I accepted a new job and all of my free time went right out the window, as well as my motivation to work out.  Not one year (since high school) have I not been dedicated to some form of exercise, except for 2011.  I will change that.  Time to get my fitness back.

2. Prepare more natural meals
Constantly feeling like I have no time and running on empty, I have resulted to those evil frozen meals, or worse, take-out.  I would say we currently take-out or dine out at least three to four times a week and the remaining days meals are literally just thrown together - usually in a microwave.  This year I want to plan my meals more effectively.  Buy fresh produce, buy foods with less preservatives, make meals from scratch.  I generally eat healthy, even given the habits listed above, but I want to learn to enjoy cooking as well.

3.  Have date night once a month
Robert and I actually started this trend a few months ago and, with the help of my mom, have been able to stick to it.  I want this to continue into 2012 so that I always have that special weekend to look forward to.  I love my children to pieces, but there's nothing better than a night alone with my husband doing things we used to do pre-kiddos.

4.  Start reading again 
Due to lack of time (are you beginning to see the theme here), I haven't read a book in its entirety in at least a year.  I hope to pick up a book and begin reading again - even it takes me a month to read it.  There was a time when I would read 1-2 books a week.  I miss that.

5.  Finish projects left undone 
Hello dining room chairs, memory boxes, photo books...

6.  Watch my tone
I am notorious for being really snappy when I'm tired, in a bad mood or what have you - and unfortunately I'm one of those who takes it out on the ones I love most, i.e. Robert.  This year I want to make a genuine effort to take a deep breath, think about how I'm coming off to others and keep my attitude in check.

7.  Pay off student loans
I'm almost there, but if I choose to take some money each week out of our normal weekly budget, I can get those bad boys paid off a lot quicker.

8.  Live a more balanced life
Be successful at work, as well as at home. My kids deserve me just as much as my students/readers - actually, a lot more.  Be a fantastic teacher/writer, but be an even more fantastic mother.


There's my list in all its glory.  Once it's published I become 100% accountable.  Here it goes...

Wednesday, February 9, 2011

My Funny Valentine

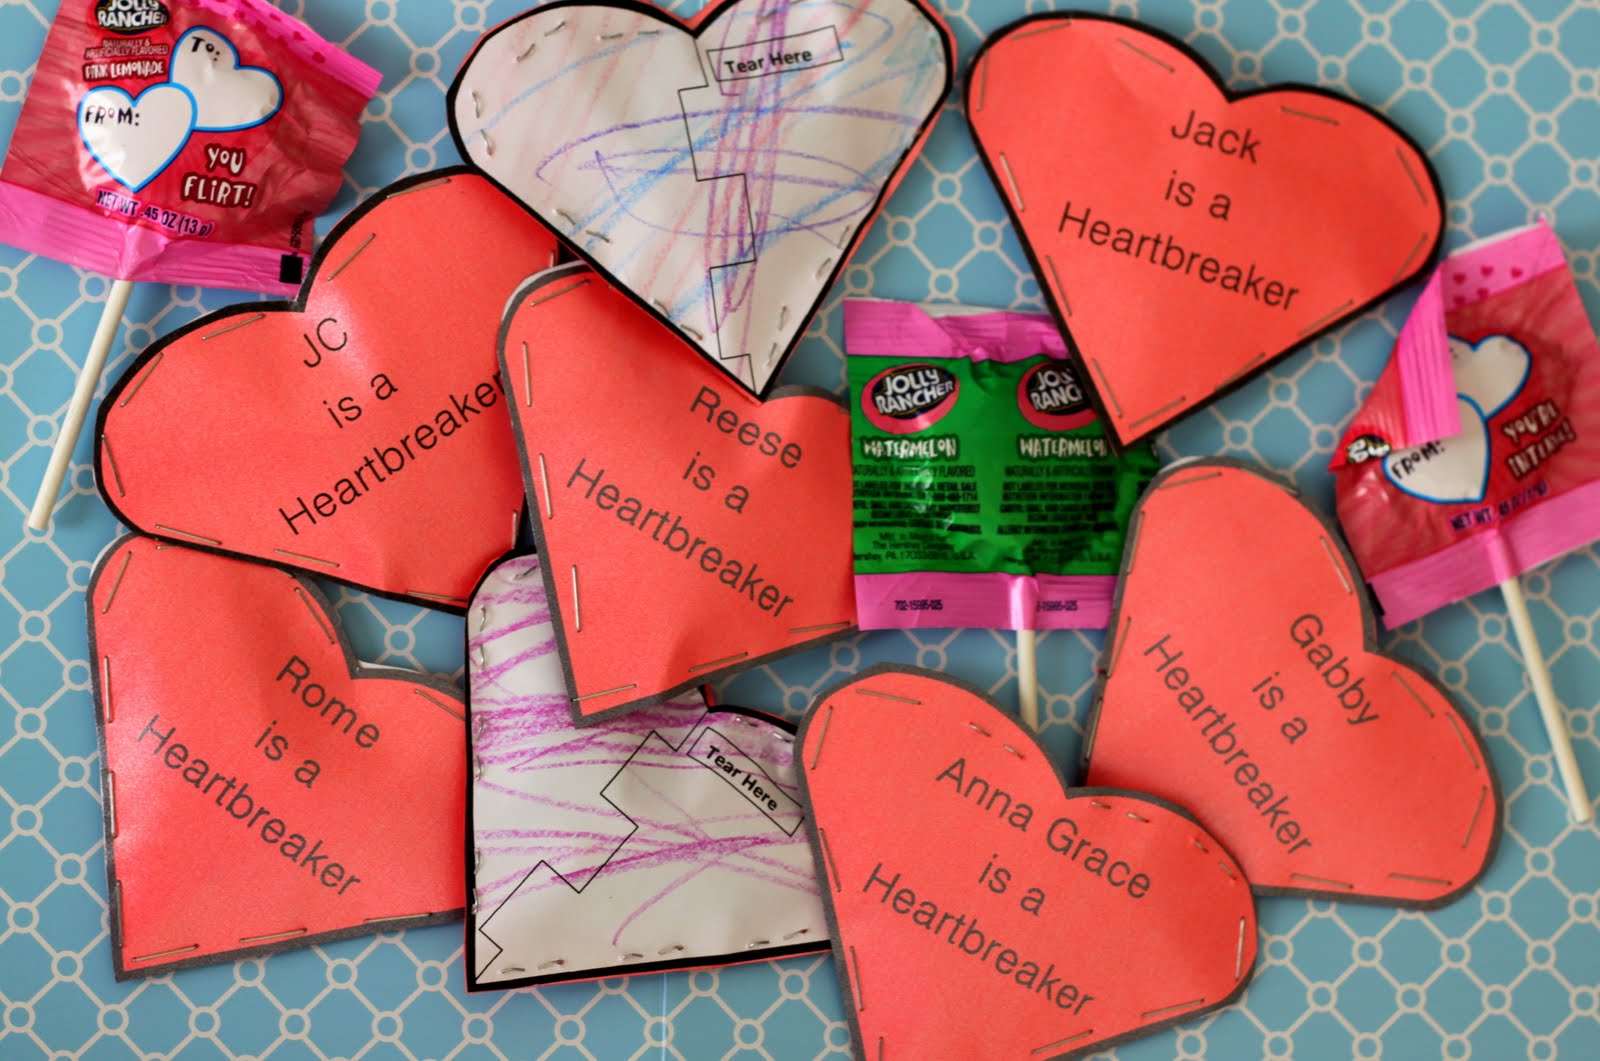
I always loved Valentine's Day as a kid.  I remember getting so excited writing the names of each kid in my class on a silly card.  Usually the card said something generic like "Be My Valentine" or  simply "Happy Valentine's Day" and I would have to be very careful who received which card.  God forbid if a boy received the "Be My Valentine" card.  Immediately rumors would swirl around about who I had a crush on and that was completely mortifying for a 10 year old.  That's what I get for passing out lame, store-bought valentines I guess.

To set the precedence I made the decision to go homemade this year with Evan's class.  I have no idea if this is something he'll buy into every year hereafter, but I'm gonna at least try and plant that seed.  I came across some cute ideas on Made that I thought would be perfect for a fun group of two year olds.

First, Evan and I made M&M-filled hearts.


Evan colored the back of each heart and helped me fill them with M&Ms.  Our pile of M&Ms was disappearing quickly due to a sneaky someone who was eating them just as quickly as we were filling up the hearts.  Of course I bought extra for just that reason.  Kids are so predictable.

We also made a Valentine card for each classmate.  No SpongeBob.  No Lightening McQueen.  We went way cooler than that...

Thursday, January 13, 2011

Bringing Sexy Back

Well, sexy might be pushing it. But I'm finally starting an exercise program to bring something back from my pre-baby days. While this extra layer of flab may be keeping me warmer this winter, I'd like to be able to trade it in for a cute bathing suit this summer.

The hardest thing about exercising, in my opinion, is just getting in the routine. In order to get results it's important to stick to some level of consistency. There are a million programs out there that guarantee results as long as you adhere to a 5 day workout plan, devoting an hour and a half to each day and sticking to a strict no carb diet. Let's face it - who can realistically do that? Maybe for a month, yes - but as a way of life, I don't think so.

For me, a three day work out plan is ideal. I can devote 45 minutes to an hour to each of these days. As far as diet goes, I just try to make healthier choices. Instead of the usual 4 scoops of ice cream, I will now settle for one. Instead of a bag of chips, I will snack on a mini bag of popcorn.  I'm a snacker by nature so I would be foolish to think I could cut all snacking out of my diet.  It would also be silly for me to think I could eat only raw veggies and fruit as my snacks and be satisfied.  I'm not preparing for a bikini contest here - just want to get back into some sort of shape - and preferably not round.

The program that I have chosen to follow is the Couch to 5K plan.  Running is the one exercise that I know I can always do no matter where I am.  It doesn't require a gym or equipment to get in my day's worth of exercise and the plan is based on 9 weeks.  That's really all I need.  Once I've reached that point successfully I can then run on my own without any sort of aid.

Today is day 1 of the program.  This is the starting point: 
Brisk five-minute warm-up walk. Then alternate 60 seconds of jogging and 90 seconds of walking for a total of 20 minutes.

I will use my blog as a motivator by recording my progress.  My brother, Tim, also mentioned that he is starting to train for the Chicago Marathon so maybe I can feed off his energy a bit too.  I'll need as much motivation as I can get.  Trust me.

Thursday, October 14, 2010

Mattie's Nursery Feature


Mattie's nursery was featured on Apartment Therapy's children's design blog, Ohdeedoh today.  How fitting since she will finally be here tomorrow.  Check out the nursery tour here.

Thursday, October 7, 2010

Self Maternity Photo Shoot

Throughout both of my pregnancies I attempted to document my growing belly by taking photos every few weeks.  The pictures were never meant to be high quality considering I usually just propped the camera up allowing myself a few seconds to run and quickly sit in its view in time for it to snap a quick shot.  When I was 38 weeks pregnant with Evan however I decided I really wanted a few maternity pictures that I could actually frame or put in an album that portrayed pregnancy for what it really is - beautiful.  So my friend Amanda set me up in a studio where she works and she took some amazing pictures that I have admired ever since.


Well, here I am 39 weeks with MJ and I have nothing of worth, as far as pictures go, to show for this pregnancy.  I also don't have Amanda to depend on to take any pictures for me.  And Robert doesn't know how to use my camera.  So, what to do, you ask?

Never underestimate the power of the self-timer.  Right, Amanda?

I decided I would do my own pictures.  That's right - by propping up the camera again and rushing into its view finder.  But this time I had a specific style of picture in mind that I wanted to take and through various resources I learned what settings I needed to use for my camera in order to accomplish that goal.  By playing around with the exposure and contrast and using natural light softened by the sheer curtains this was the final result - and I'm really happy with it.


Sunday, September 26, 2010

Bedrooms Complete

Finally knocking out Evan's bed brings his big boy room to completion.  I now have both kids' rooms ready for our next family phase.

Here are a few before pictures of his room along with pictures of the bed I purchased on Craigslist for a whopping $25.


I painted the bed dark blue to match the color palette of the room.  It's a great kid's bed - solid wood with additional drawer storage underneath.

The rest of the room came together pretty easily.  I've never been one big on themes.  I picked the robot bedding primarily for the colors, but Evan also appreciates them along with many other things.  That is why I stuck to a color theme rather than a specific character or idea.  You'll notice cars, airplanes, kids art, photographs and many other contributing features.  Sticking to a robot theme would not have been an accurate reflection of Evan.  I would have at least had to go with cars and trucks if I were gonna stick to any one theme.

Here is the completed room:


Saturday, September 25, 2010

Beyond Adorable

I decided to try another sewing project to make use of the left over fabric I had from MJ's nursery.  Because I am one of those mothers who is totally guilty of letting their child run around in only a diaper at home, I thought I could at least make a cute diaper cover that could pass as being partly dressed.

How cute will MJ look in this?


You can see that my stitching is still far from perfect and it took me way longer to make this than the average person - but seriously, so cute, right?  I have found so many adorable sewing projects that I will hopefully get around to trying. But being a newbie time is a must.  I was able to get this finished today because I am taking care of my sick little boy (again) who only has the energy to lay in the bed and watch tv.  He has an ear infection and a fever and is not at all happy about it.  But how sweet does he look?


Friday, September 17, 2010

Y'all Ready for This?

I've been procrastinating for the past week on getting the nursery completed because I had one project left to complete - the crib sheet.  Not only would be this be the first crib sheet I've ever sewn, but this would be the first thing I've EVER sewn on my own. I didn't even own a sewing machine up until this week (thanks, mom, for the early Christmas gift).  So I literally had to teach myself how to use a sewing machine before I could even begin.  I found that threading the machine was more difficult than the actual sewing part, but I'll save everybody from those boring details.

In just under an hour (and I'm sure this can be done a lot quicker once you know what you're doing) this is my finished product and I am more than pleased with it.


Of course there are imperfections in the stitching and the fit isn't perfect either, but the average person would never know.  It looks great in the crib - as does the crib skirt which I made completely sew free! 

And with that I can now reveal the finished nursery - please excuse some of these pictures.  The nursery only has one window so the lighting is poor.  Maybe one day when I acquire a more advanced lens and an external flash I can produce better indoor photos - until then, this is what you get.


What do y'all think?

Friday, September 10, 2010

Here's What We're Working With

These are the key components of MJ's nursery.  Obviously accessories are not included here other than a few art prints.  But based on my own personal challenge to achieve a budget friendly design that is both modern and stylish, this is the cost breakdown.

  1. Gulliver Crib - IKEA - already had
  2. Confetti Forest White Fabric by thebline - Spoonflower - $36 for 2 yards 
  3. Berry Chevron Fabric by thebline - Spoonflower - $36 for 2 yards
  4. Hot Dot in Sky Fabric by Heather Bailey - Etsy - $7.50 for 1 yard
  5. Hemnes Dresser - IKEA - already had
  6. Art Work x 6 - Feed Your Soul -  Free Download
  7. Wooden Shelves (painted white) - IKEA - $6 for 2
  8. Snille Visitor Chair - IKEA - already had
  9. Scalloped Accent Table - Wal-Mart - $25
  10. Regolit Pendant Lamp - IKEA - $10
  11. Bentwood Rocker - Craigslist - $20
  12. Zinnia Path in Spring Fabric by Paula Prass - Etsy - $13 for 2 yards
  13. Leather Pouf - Target - $20
  14. Expedit Bookcase - IKEA - $69

Let's quickly revisit the final cost of the fabulous nursery Sarah put together for me - also excluding most accessories her total cost was roughly $3500.  The total cost of my nursery ended up being a modest $250.  My cost includes all art work and wall hangings.  I may have an additional $30 - $50 in other accessories which still brings me in under $300.

How 'bout that for budget friendly?  I'll be posting pictures soon.

Wednesday, September 8, 2010

Wall Flowers


I am not sending the message to MJ to be a wall flower - I'm simply digging the beauty these big blossoms add to the decor of her room.  I currently have these hanging over the crib.  They are safe and make a nice, bold statement on a rather drab colored wall.  And these only took me about 20 minutes to make.

My friend, Amanda, referred me to a blog called Made that I absolutely adore.  The author of this blog has several tutorials listed ranging from sewing projects to craft projects to demonstrating techniques.  I came across her tutorial for the wall flowers and immediately knew I wanted to incorporate them somewhere in MJ's nursery.  How I was going to do it was the question.

In the beginning I had planned to hang a pendant light over the crib in lieu of any artwork on the adjacent wall.  But somewhere along the line I decided to move the crib to the other side of the room which exposed even more wall behind the crib.  I felt that wall really needed something more - and here enters wall flower idea.  I also decided I wanted to frame the flowers rather than hanging them freely.  That's my need for structure coming out in me, I think.  I found a frame at Goodwill for $2 and painted it white.  After painting it I noticed a crack running along the top side - but honestly, it was that much more appealing to me.  The flowers are made using napkins.  You literally fan fold the napkins, scallop the edges and secure in the middle with a twist tie.  From there you simply separate and pull up on each layer of napkin forming petals all around.  They really are incredible for the little amount of time that goes into making them.

I will share a few other wall art ideas I put to use later.  I'm now working on the crib skirt which I'm really excited about.

Tuesday, September 7, 2010

Recovered Rocker

With only five weeks until my due date I am scrambling to get the last few things completed in MJ's nursery before her arrival.  My goal for this nursery was for it to be as budget friendly as possible while still having a basic design in mind to follow - reference here.

I feel like I have accomplished what I set out to do.  Initially I made a list of various items I was planning to purchase such as bedding, an upholstered glider and artwork.  But to add a more personal touch I decided to do a lot of these things myself.

The first DIY project I took on was finding a rocker to recover.  I've always liked the bentwood rockers that seem to show up on Craigslist quite a bit.  I came across one selling for $20 and it appeared to be in pretty good shape.  My plan was to paint the chair, but when I got it back to the house I realized it was in fantastic condition - the finish was almost flawless.  Even though the maple colored wood is not my favorite I decided I could work with it.


The next step was finding a fabric to recover the seat and back of the chair.  I already had my bedding fabrics picked out so I knew what color palette I was working with.  I decided on Paula Prass' Zinia Path in Spring.  The colors were perfect and I felt it would bring in just the right amount of femininity I was looking for.   What do you think?


I have a few more projects to share over the next few days - hopefully the nursery will be ready for its big reveal in the next couple of weeks.  I think I said that about Evan's room and I still haven't finished his bed yet.  That's also on my things to do this week list.

Sunday, August 15, 2010

Sneak Peak

With just a couple of last minute additions left, Evan's big boy room is almost complete.  But I wanted to go ahead a give a little sneak peak to show off my two favorite aspects of the room - the first being the book shelves using vinyl house gutters.  This was a project that I had read about on a few different blogs and I always loved how they turned out.  Not only do they save space, but they look so much more attractive because the books are positioned with the covers facing forward rather than the bindings.  Supposedly studies have proven that this positioning also encourages reading for the little ones.

Materials:  1 10' gutter cut in half to make 2 5' shelves, 6 brackets (3 per shelf), 2 right end caps and 2 left end caps, sheet rock screws - you simply mount the shelves where ever you want them and screw in the brackets - Done!  I followed the tutorial from this blog via Little Green Notebook.


The second project I absolutely love is the chalkboard wall.  Evan's new room is rather large leaving a lot of wall space to fill.  Because the room has slanted ceilings towards the front I thought one side would be a perfect place for a chalkboard wall - and I was right.  It turned out great!  I mounted another gutter shelf to use for chalk and erasers which has proven to be a great decision.  I also purchased two magnetic boards from Ikea and hung them at one end of the wall to add another option of activity.  Evan LOVES it so far.

Materials:  1 pint of moonbeam chalkboard paint (applied two coats)


I will reveal the completed room in another week or so.  I'm in the midst of painting a bed (craigslist find) and waiting on the arrival of a table and chairs.  It's gonna be lovely.  Can't wait.

Saturday, July 24, 2010

A Yearbook of Memories

I have over 90 albums in my photo gallery.  They are all organized and labeled making it extremely easy to find specific pictures and to view each album.  While this is all great, I still miss having an accessible album I can just whip out to show a family member or a friend.  So I made the decision last year that I would make a photobook for each passing year highlighting various events and family memories. 

My Publisher is the software I chose to use to design each book.  It is a free download and as user friendly as any program can be.  Because I was not very familiar with the program, my first book I would rate as "ok."  I missed out on using all the different picture configurations they have available so my pages are a bit boring and lacking diversity.  But the second book I think is much better.  I will certainly strive to mix it up each year and do different styles and layouts, but I'm just happy to have a hard copy on hand.  These are hardback books with dust jackets and glossy pages.  Take a look.


Wednesday, July 21, 2010

Nursery Design on a Budget

My friend Sarah, the designaholic (although she's certainly not in denial about that fact), took the time to put together various design elements to produce a fabulous nursery for MJ.  As we all know, the more money you're able to spend the more fabulous your designs can be - generally speaking of course.  The good majority of us however live on a budget and have to be somewhat realistic in our design choices.  As much as I would LOVE to just snap my fingers and have all of Sarah's findings make themselves at home in MJ's nursery - well, it just ain't gonna happen - I can quickly hang that one up.  But I have decided to challenge myself by following Sarah's design as closely as possible only finding budget friendly alternatives.  Here are the main components that Sarah chose:

Mattie' Nursery
GULLIVER
$100 - ikea.com

scalloped mirror
pbteen.com
The grand total of this nursery design is roughly $3500 - and this excludes the extra accessories.  I wouldn't be able to afford to give birth to MJ if I threw down that kind of money for her nursery.  Luckily, we already have the crib and the dresser which Sarah included in her mock up.  I've already acquired a few alternative pieces, but I will reveal the budget friendly nursery in its entirety when I have completed my search.
Let's also keep in mind that Evan's big boy room is currently underway too - so I can't put enough stress on the word budget.  Not to mention the guest bedroom.  The rest of the house is somewhat in order - needs some more accessories here and there, but the major components are there.
OK - it's on.